
Isn’t it wonderful that you can instantaneously record life’s moments with your smartphone? It is like carrying around a high-end camera in your pocket. However, are you making the most of it? We are not referring to basic point-and-shoot pictures here. A plethora of sophisticated ways exist to transform your smartphone photos into breathtaking pieces of art. That’s exactly what this tutorial is designed to teach you.
Remember that a smartphone featuring an excellent camera may transform your life. For example, when you sell iPhone 13 Pro Max, you’re providing more than just a phone — you’re opening up access to professional-grade photography.
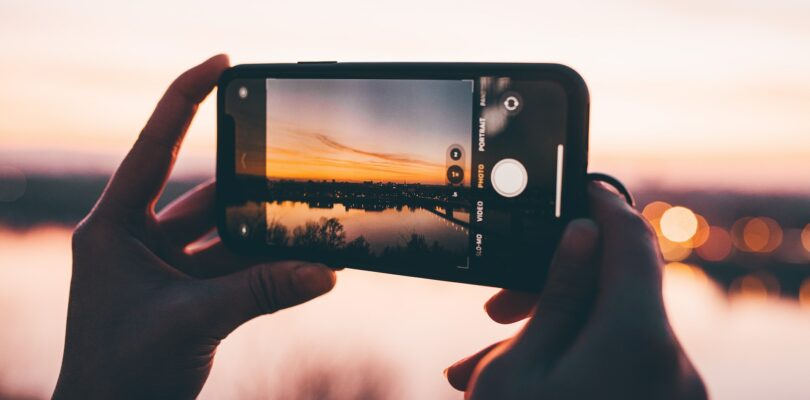
Smartphone Camera Basics
Prioritize knowledge of your camera. Even if your smartphone doesn’t appear complicated, it has a ton of capabilities that may really make a difference.
- Exposure: Controls the light in your photos. Adjust it to avoid too dark or too bright images.
- ISO: This setting affects the camera’s sensitivity to light. Lower ISO for sunny days, higher for darker scenes.
- HDR (High Dynamic Range): It combines multiple photos at different exposures for a more dynamic image.
Composition Techniques for Beginners
Composition is key. Here are some simple techniques to start with:
- Rule of Thirds: Imagine your screen is divided into nine equal segments. Place your subject along these lines or their intersections.
- Leading Lines: Use natural lines in your scene to lead the eye towards your main subject.
- Framing: Frame your subject using elements like windows or doorways for a more compelling photo.
Mastering Manual Mode
Gaining access to the camera on your smartphone is similar to playing a new game level. Pro Mode is your key to unrestricted creativity, not just a perk. This is your domain. You choose the overall aesthetic of the shot, adjusting the parameters to suit your style. Let’s dissect it:
- Focus: Here’s where you choose whatever area of your image needs to be crisp. When you do it correctly, your primary topic is distinct, straightforward, and easy to follow.
- White Balance: Have you ever noticed that images might appear too yellow or blue at times? The white balance is used in this situation. Make necessary adjustments to ensure that the colors in your images accurately reflect the actual world.
Setting ISO, Shutter Speed, and Aperture
This is going to seem a little technical, but don’t worry, it’s not:
- ISO: Think of it as the light sensitivity of your camera. Less sensitivity with a lower ISO is ideal for sunny days. For darker circumstances, a higher ISO is ideal, but use caution—too high of an ISO and your images may become blurry.
- Shutter Speed: Motion is everything. Do you want to stop a fast-moving vehicle? Select a shutter speed that is fast. Do you want to record a waterfall’s flow? All you need to do is set the shutter speed slower.
- Aperture: This refers to the amount of light that is let in. For portraiture, a smaller aperture number produces a beautiful blurred backdrop and more light. A higher number is ideal for landscape photography as it indicates less light and more concentration on your image.
Creative Lighting Techniques
The greatest ally of a photographer is natural light. It’s lovely, silky, and best of all, cost-free! This is how to apply it:
- Golden Hour: There is something wonderful about the hour right before or after daybreak. It provides a gentle, warm glow to everything, making it ideal for landscapes and portraiture.
- Cloudy Days: Cloudy sky resembles the softbox of nature. They provide steady, gentle light that is excellent for many forms of photography.
- Backlighting: Stunning silhouettes or a halo effect may be produced by the light shining behind your subject. Though a little difficult, it’s well worth the work.
Experimenting with Artificial Lighting
Not all lighting is artificial, even in studios. You may use it creatively in your own home:
- Using Flash Wisely: Flashing directly might be painful. If you want a softer, more organic effect, try bouncing it off a wall or ceiling.
- Colored Lights: Play with colored bulbs or even your smartphone’s screen for interesting, colorful effects.
- DIY Solutions: Lacking professional lighting? Not an issue. If you utilize your phone’s flashlight creatively, even a basic desk lamp may be really useful.
Creative Filters and Effects
Filters are useful for more than just altering color or creating a retro aesthetic. Their purpose is to narrate a tale and create an atmosphere. Consider them as the icing on the cake that makes your idea come to life. The truth is that less is frequently more. While a harsher filter might create an entirely other universe, a subtle one can bring out the beauty of an image. Conversely, overlays can provide dimension or a creative touch. Just keep in mind that the intention is to enhance, not to overshadow, your image.
Creating Unique Effects
Filters are useful for more than just altering color or creating a retro aesthetic. Their purpose is to narrate a tale and create an atmosphere. Consider them as the icing on the cake that makes your idea come to life. The truth is that less is frequently more. While a harsher filter might create an entirely other universe, a subtle one can bring out the beauty of an image. Conversely, overlays can provide dimension or a creative touch. Just keep in mind that the intention is to enhance, not to overshadow, your image.
Showcasing Your Work
Let’s now discuss exhibiting your artwork. Your gallery is social media. Of course, Instagram is the best option, but there are other options. Moody boards are a terrific use for Pinterest. Sharing is possible on Facebook with friends and family. Additionally, don’t ignore TikTok — it’s a developing community for artists just like you, not only for dance videos. Every platform has an identity. Choose the ones that complement your style, then begin to grow your following.
Building an Online Portfolio
You might want something more formal than social networking. An electronic portfolio resembles a self-curated photographic exhibition. Here’s your chance to present your finest work, explain the meaning behind each image, and maybe attract the attention of future partners or clients. Start with websites like Flickr or Behance. You may even go over and above and make your own website. It conveys the idea that “I take my photography seriously”.
Improve the quality of your smartphone images
Alright, let’s complete this. We have together delved into the world of advanced smartphone photography. experimenting with lighting, changing the settings manually, and learning how to use filters and effects artistically. Even though there is a lot to take in, remember that practice makes perfect. These tips may be used as a set of tools to help you transform average photographs into visually appealing ones.
Photography is an art form, and your smartphone is your canvas and brush. With these skills, you’re not just taking photos; you’re telling stories, making memories, and creating art. Keep learning, keep trying new things, and most importantly, keep enjoying yourself while doing it. Now that you are aware of how to maximize its potential, your smartphone may be considered a very potent tool. Thus, feel free to begin snapping images, and you’ll notice how your work changes.